Cea Design Italian bath and kitchen taps, faucets, shower systems, plumbing fixtures
With a forward-looking vision and a passion for reinterpreting classic bathroom elements, CEA Design has become a benchmark in the world of contemporary bathroom fittings and décor. Renowned for its ability to merge technology, innovation, and refined aesthetics, CEA transforms essential everyday objects into sophisticated design statements.
Drawing on decades of expertise in the plumbing and heating sectors, the company brings exceptional technical know-how to every collection. This unique background allows CEA to anticipate trends and develop solutions that combine performance, elegance, and sustainability.
Every CEA Design creation embodies the principles of modern architecture: an emphasis on clean lines, innovative functions, and the use of alternative, sustainable materials. From faucets and shower systems to accessories, each piece is designed to elevate bathrooms and wellness spaces with a distinctive, contemporary character.
Where can I purchase CEA Design fixtures in the United States and Canada?
La Mercanti is an authorized distributor of CEA Design in North America. Explore our curated collection online or contact us for design consultation, technical specifications, and project coordination.
Frequently Asked Questions about CEA Design
Why is stainless steel the ultimate material for luxury faucets, and why does CEA Design exclusively use AISI 316L?
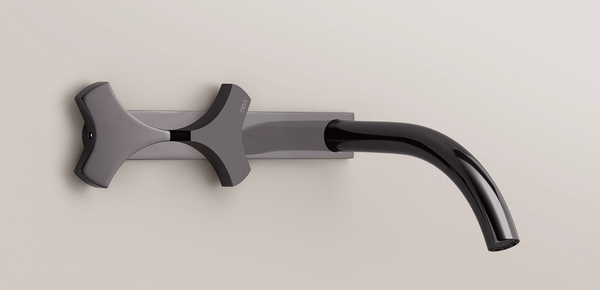
Here's what most luxury faucet brands won't tell you: brass and bronze dominate the market because they're cheaper to manufacture, not because they're superior materials. CEA Design made a radically different choice in 1984—100% AISI 316L stainless steel for every single faucet, shower system, and fixture they produce.
Why AISI 316L matters for your home:
Marine-grade corrosion resistance: This is the same steel used in superyachts and coastal architecture. It withstands salt spray, chlorine, hard water minerals, and aggressive cleaning chemicals without pitting, staining, or degrading. That chrome-plated brass faucet in your guest bath that's developing spots after three years? AISI 316L doesn't do that—ever.
Genuinely hygienic surfaces: Stainless steel is non-porous at the molecular level, which means bacteria, mold, and biofilm literally cannot colonize the surface. In an era where we're wiping down doorknobs with disinfectant, your faucet shouldn't be harboring microorganisms in microscopic surface imperfections. AISI 316L is the material hospitals and commercial kitchens specify for exactly this reason.
100% recyclable without degradation: Unlike brass (which contains lead traces) or chrome plating (which involves toxic hexavalent chromium in processing), stainless steel can be endlessly recycled without losing structural integrity. When you eventually remodel in 2045, your CEA faucet becomes feedstock for new stainless products, not landfill waste.
No plating means no peeling: Chrome-plated faucets look spectacular in the showroom. Five years later, aggressive cleaners or simple wear patterns cause the plating to delaminate, exposing base metal underneath. AISI 316L is solid steel through and through—the finish you see today is the finish you'll see in 20 years.
Weight and presence: Pick up a CEA faucet and you immediately feel the difference. Solid stainless steel has substantial heft that communicates quality and permanence. This isn't a stamped zinc casting trying to impersonate luxury—this is precision-machined Italian engineering.
The investment perspective: Yes, CEA faucets cost more upfront than brass alternatives. But calculate cost-per-year over a 20-30 year lifespan (the typical service life of AISI 316L fixtures), and suddenly the economics shift dramatically. You're not replacing corroded cartridges, refinishing degraded surfaces, or ripping out and replacing failed fixtures every decade. You install once, enjoy forever.
For architects and designers specifying fixtures for coastal properties, spa environments, or any application where longevity and hygiene are non-negotiable, AISI 316L isn't a premium option—it's the only rational choice. CEA Design built their entire company around this truth.
What's the real difference between Italian design faucets and American mainstream brands—and why does it matter beyond aesthetics?
Walk into any Home Depot or Lowe's and you'll find aisles of perfectly functional faucets from Moen, Delta, and Kohler. Install one and your kitchen works fine. But here's what you're not getting—and why discerning homeowners and designers increasingly specify Italian manufacturers like CEA Design instead.
Design philosophy, not product development: American mainstream brands approach faucets as plumbing products that happen to be visible. Italian manufacturers approach them as sculptural objects that happen to deliver water. This isn't semantic quibbling—it fundamentally changes how the product is conceived, engineered, and manufactured.
CEA Design collaborates with architects like Jean-Michel Wilmotte (who designed the Louvre's Islamic art galleries) to create collections like Lutezia—faucets that could credibly appear in MoMA's design collection. These aren't products designed by engineering committees to hit price points and maximize SKU proliferation. They're artistic statements developed by designers who consider proportion, visual weight, surface interaction with light, and the tactile experience of daily use.
Material authenticity vs. cost optimization: The stainless steel comparison is stark. In 2024, stainless steel faucets represent only 8-12% of the U.S. market, primarily because American manufacturers prioritize brass and zinc alloys that are cheaper to cast and machine. CEA Design's commitment to 100% AISI 316L stainless steel since 1984 represents a completely different value system—one that prioritizes 30-year performance over 30-day production costs.
Modularity and future-proofing: American brands refresh product lines every 18-24 months, which sounds innovative until you need replacement parts for a five-year-old faucet and discover it's been discontinued. CEA Design's collections remain in production for decades, with parts availability guaranteed. The Ziqq collection you install in 2025 will still be serviceable in 2045 because CEA maintains manufacturing tooling and component inventory for legacy products.
Sustainability as engineering, not marketing: Every faucet manufacturer now claims to be "eco-friendly." CEA Design's Bassano del Grappa facility transitions to 100% renewable energy in 2025, uses FSC-certified packaging, operates closed-loop water testing systems, and manufactures products from a material that's infinitely recyclable. This isn't greenwashing—it's vertically integrated environmental engineering.
Touchless technology done right: American brands were early adopters of touchless faucets, but often implemented them with battery-powered sensors that fail after 18 months and proprietary cartridges that cost $200 to replace. CEA Design's approach integrates sensor technology into fundamentally superior mechanical platforms—so you get the convenience of hands-free operation without compromising the longevity and serviceability that defines Italian engineering.
The specification decision: For residential clients investing $150,000+ in a kitchen renovation or $80,000+ in a primary bathroom, the faucet represents roughly 2-4% of total project cost. Specifying mainstream brands in this context is bizarre—you're saving perhaps $2,000 on fixtures while spending $40,000 on countertops. Italian manufacturers like CEA Design allow the faucet to match the ambition of the overall design, not undermine it.
This isn't about being snobby or overpaying for a logo. It's about recognizing that some products are engineered as disposable commodities, while others are designed as permanent installations. CEA Design belongs definitively in the second category.
How do I choose between CEA Design's collections (Ziqq, Regolo, Cross, Opus, etc.) for different spaces in my home?
CEA Design offers 15+ distinct collections, which initially seems overwhelming until you understand the design logic. Each collection was developed to solve specific aesthetic and functional challenges. Here's how architects and designers actually approach selection:
Start with architectural context, not personal preference:
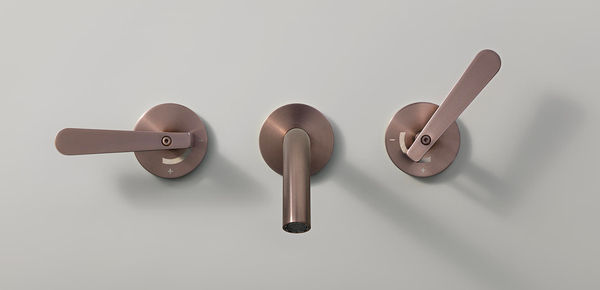
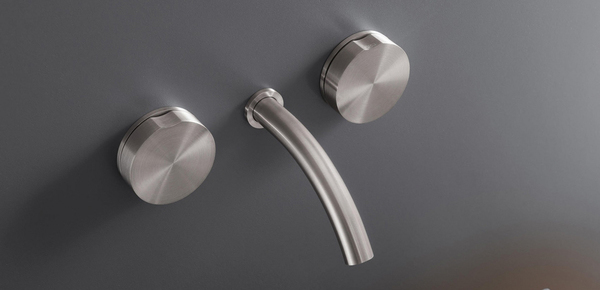
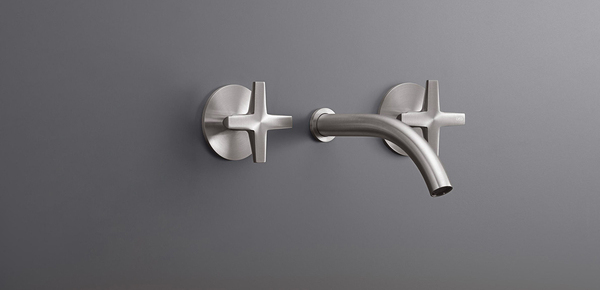
Contemporary minimalist spaces (2010s+ new construction, modernist renovations): Regolo, with its linear cursor control and geometric purity, or Cross, with its intersecting-axis design language. These collections use reduction and precision to achieve visual quiet—they enhance minimalist spaces without competing for attention.
Transitional and soft-modern interiors (the vast majority of high-end U.S. residential): Opus, Lutezia, and Ziqq work beautifully here. They have enough sculptural presence to feel special, but aren't so aggressively modern that they clash with warmer materials, traditional cabinetry, or classic tile work. Opus is particularly brilliant for this—it reads as sophisticated and timeless rather than trendy.
Industrial loft, urban, or masculine-leaning spaces: The InOut collection, with its exposed valve bodies and mechanical detailing, or any collection in a brushed or gunmetal finish. These celebrate the machinery of plumbing rather than concealing it—perfect for spaces with exposed ductwork, concrete, and steel structural elements.
Coastal or spa-inspired environments: This is where AISI 316L stainless steel becomes non-negotiable, so every CEA collection works, but consider finishes. Satin and brushed surfaces hide water spots better than polished in high-humidity environments. The Giotto and Neutra collections, with their soft-radius geometries, feel particularly appropriate in wellness-focused spaces.
Function-specific considerations:
Kitchen applications: Pull-down or pull-out spray functionality is expected in American kitchens. CEA's kitchen collections integrate commercial-grade spray heads without the agricultural aesthetic of typical "professional" faucets. Look at collections that offer 360° spout rotation and magnetic docking—quality-of-life features that matter daily.
Powder rooms and guest baths: This is where you can be more adventurous. Single-handle wall-mounted designs (like certain Ziqq or Giotto configurations) create visual drama in small spaces. The reduced footprint also makes countertop maintenance easier—no base plate collecting grime.
Primary bathrooms: If you're installing a freestanding tub, the floor-mounted tub filler becomes a sculptural focal point—don't default to wall-mounted just because it's familiar. For double vanities, specification consistency matters: matching his-and-hers faucets in a premium finish signal attention to detail.
Outdoor showers (increasingly popular in luxury residential): CEA's outdoor-rated collections aren't just bathroom faucets installed outside—they're engineered for UV exposure, thermal cycling, and year-round weather. The finish warranty extends to exterior applications, which almost no other manufacturer offers.
Finish selection strategy: CEA offers 20+ finishes, but resist the temptation to use six different ones throughout your home. Pick two: a primary finish for 80% of applications (polished or satin stainless is always safe), and an accent finish for 20% (maybe brushed bronze for powder rooms or black steel for the primary bath). Finish consistency across spaces creates visual coherence even when using different collections.
Working with your design team: Request physical samples—finish and weight matter enormously in person. CEA products have substantial heft that photographs can't convey. If you're working with a kitchen and bath showroom, they can often arrange mock-up installations so you experience the ergonomics before committing. Digital renderings are useful for layout, but don't finalize fixture specifications until you've physically interacted with the hardware.
What does a CEA Design bathroom or kitchen actually cost—and how should I budget for a luxury fixture package?
Pricing transparency is rare in luxury fixtures because costs vary wildly based on configuration, finish, and installation complexity. Here's real-world guidance based on 2024-2025 pricing:
Per-fixture investment ranges:
Powder room (single-sink, wall-mounted faucet, simple configuration): $800-$1,400
You're looking at a single-handle wall-mounted mixer in a standard finish. This covers the visible fixture only—rough-in valve, installation labor, and any required plumbing modifications are additional.
Guest or secondary bathroom (vanity faucet, shower system, basic accessories): $2,200-$4,000
This includes a deck-mounted vanity faucet ($900-$1,400), a thermostatic shower mixer with rainhead and handshower ($1,800-$3,200), and toilet flush plate if you're doing a wall-hung toilet. Finish upgrades can add 25-40% to these base prices.
Primary bathroom (dual vanity, freestanding tub filler, luxury shower system, accessories): $8,500-$16,000
Breaking this down: Two vanity faucets ($1,800-$2,800), floor-mounted tub filler ($2,500-$4,500), multi-outlet thermostatic shower system with rainhead, body sprays, and handshower ($4,500-$8,000), plus towel warmers, accessories, and flush plates ($800-$1,200). Premium finishes like brushed bronze or black steel can push the high end toward $20,000+.
Kitchen (primary sink faucet, pot filler, beverage/prep sink): $1,800-$4,500
A professional-style pull-down kitchen faucet runs $1,200-$2,000. Add a wall-mounted pot filler above the range ($800-$1,400) and a bar/prep sink faucet ($600-$1,000), and you're at $2,600-$4,400 for fixtures only.
Outdoor shower (coastal, pool, or spa applications): $3,500-$7,000
Exterior-rated thermostatic systems with rainhead and handshower, engineered for year-round exposure. This is a completely different product category from interior shower systems—don't assume you can just install a bathroom fixture outside.
Complete home fixture package (4-bedroom, 4.5-bath luxury residence): $28,000-$55,000
This assumes: one primary bath with full luxury specification, two secondary baths with quality fixtures, two powder rooms, one kitchen, possibly an outdoor shower or mudroom utility. At the low end, you're choosing simpler configurations and standard finishes. At the high end, you're selecting statement pieces, premium finishes, and maximal functionality.
What affects final cost:
Finish selection: Polished or satin stainless is "base" pricing. Brushed bronze, black steel, rose gold, and other specialty finishes add 30-50%. Some ultra-premium finishes (like specific PVD coatings) can double the cost.
Configuration complexity: A single-hole deck-mounted faucet is straightforward. A wall-mounted installation requires rough-in valves concealed in the wall, which affects both material and labor costs. Thermostatic shower systems with multiple outlets require significantly more plumbing infrastructure than basic pressure-balanced valves.
Installation labor: Budget 40-60% of fixture cost for professional installation. A $3,000 shower system might require $1,500-$2,000 in plumber labor, especially if you're retrofitting rather than new construction. Wall-mounted and floor-mounted fixtures require more complex rough-in work than deck-mounted alternatives.
Project timing: If you're renovating an existing bathroom, some fixtures might require structural modifications (reinforcing walls for wall-hung toilets, relocating drain lines for tub placement, etc.). These aren't fixture costs per se, but they're triggered by fixture selection.
Volume consideration: If you're building or renovating multiple bathrooms simultaneously, distributors can often negotiate package pricing. A 5-10% discount on a $40,000 fixture order is meaningful.
Comparison perspective: A premium Kohler or Brizo bathroom can easily run $4,000-$7,000 in fixtures. You're not choosing between $500 and $5,000—you're choosing between $4,000 mainstream luxury and $8,000 Italian luxury. The delta is narrower than most people assume, especially when you factor in the longevity differential of AISI 316L stainless steel.
Are CEA Design fixtures genuinely suitable for American plumbing systems, or will I have compatibility nightmares with U.S. building codes?
This is the question every architect and plumber asks before specifying European fixtures for the first time. The short answer: CEA products are engineered for global markets, including full U.S./Canada compliance. The longer answer requires understanding what "compatibility" actually means.
Plumbing code compliance (the non-negotiables):
Pressure and flow rates: U.S. EPA WaterSense certification requires kitchen faucets flow at ≤1.8 GPM (gallons per minute) and bathroom faucets at ≤1.2 GPM. CEA fixtures meet or exceed these standards. European markets often allow higher flow rates, but CEA's U.S.-bound inventory is configured specifically for American regulations.
Temperature regulation: Thermostatic mixing valves must comply with ASSE 1016 (American Society of Sanitary Engineering) standards for anti-scald protection. CEA's thermostatic systems include this certification—critical for legal liability if you're specifying fixtures professionally.
Backflow prevention: All CEA faucets include integral check valves to prevent contaminated water from siphoning back into supply lines, meeting UPC and IPC code requirements. This is baseline compliance, but worth verifying with any imported fixture.
Lead content: The federal Safe Drinking Water Act mandates ≤0.25% weighted lead content in plumbing fixtures. AISI 316L stainless steel contains zero lead, making CEA fixtures compliant by material choice rather than plating manipulation. This matters increasingly as states like California implement even stricter standards.
Installation considerations (where planning prevents problems):
Rough-in valve compatibility: CEA supplies proprietary rough-in valves designed to integrate with their trim kits. Your plumber can't substitute a Kohler rough-in valve and expect a CEA trim to fit—the threading, dimensions, and cartridge interfaces are manufacturer-specific. Order rough-ins and trims together from the same source to avoid job-site disasters.
Wall-mounted installations: U.S. construction typically uses 2x4 stud framing, while European systems sometimes assume masonry walls. CEA provides mounting solutions for both, but your plumber needs to install proper backing during framing—you can't securely mount a wall-hung fixture to drywall alone. This is planning, not product limitation.
Supply line connections: U.S. plumbing uses NPT (National Pipe Thread) standards. CEA fixtures intended for U.S. markets ship with NPT-compatible connections. If you're sourcing directly from Italy or through gray-market channels, verify thread standards—mixing NPT and BSP (British Standard Pipe) threads creates leaks. Authorized U.S. distributors like La Mercanti eliminate this concern.
Water pressure optimization: CEA fixtures perform beautifully at typical U.S. residential pressure (40-80 PSI), but if your home has unusually high pressure (>80 PSI, common in high-rise buildings or areas with elevated municipal pressure), install a pressure regulator. This protects all fixtures, not just CEA products, and prevents premature cartridge wear.
The California Energy Commission (Title 20/24) situation: California has the nation's most stringent fixture efficiency requirements. CEA's U.S. product lineup is CEC-compliant, but if you're an architect specifying fixtures for a California project, verify specific model compliance rather than assuming brand-level certification. La Mercanti maintains current CEC documentation for all California-legal products.
Warranty and service in North America: This is where authorized distribution matters enormously. CEA provides a 5-year limited warranty on fixtures, but only when purchased through authorized channels. Gray-market fixtures (purchased from European retailers and imported privately) void warranty coverage and leave you without parts access when needed. La Mercanti stocks replacement cartridges, aerators, and service parts for immediate shipping—try getting a proprietary CEA cartridge from Italy on a Friday when your client's primary bathroom faucet fails.
The practical reality: Thousands of CEA installations exist across North America with zero code compliance issues. The fixtures are engineered for global markets, which means they're typically more stringent than any single jurisdiction requires. The "compatibility nightmares" typically result from poor planning (not ordering rough-in valves with trim kits) or using unlicensed plumbers unfamiliar with luxury fixture installation—not from product deficiencies.
How should architects and interior designers actually specify CEA Design fixtures in construction documents and coordinate with plumbing contractors?
Here's the reality of luxury fixture specification: Your construction documents say "CEA Design Ziqq collection, satin finish" and three months later the plumber has installed something that looks vaguely similar but costs half as much because "it's basically the same thing" and "the client will never know." This happens because fixture specification is often treated as aesthetic preference rather than engineered system design. Here's how professionals prevent this:
CSI MasterFormat specification language (what actually goes in your construction documents):
Section 22 41 00 – Residential Plumbing Fixtures: "Bathroom faucets shall be CEA Design [Collection Name], Model [Specific SKU], AISI 316L stainless steel construction, [Finish Name] finish. No substitutions permitted without written approval from Architect and Owner. Alternative manufacturers [list none] not approved." This is non-negotiable language that prevents value-engineering substitutions.
Include technical datasheets: Attach CEA's product specifications as addenda to your construction documents. Plumbers need rough-in dimensions, required inlet pressure ranges, flow rates, mounting requirements, and electrical requirements (if specifying sensor-activated fixtures). Saying "CEA Ziqq faucet" without dimensional data guarantees coordination problems.
Rough-in coordination drawings: CEA provides CAD files and BIM objects for major collections. Import these into your architectural drawings rather than using generic placeholder symbols. When your plumber rough-ins valves 2" off-center because the architectural drawing showed a generic faucet symbol, fixing it requires wall demolition and re-plumbing—$3,000 in change orders because someone didn't verify actual product dimensions.
Material procurement strategy (who orders, when, and why it matters):
Owner-furnished vs. contractor-furnished: For luxury fixtures, owner-furnished (where the client purchases directly and the contractor installs) is often smarter than contractor-furnished. Reasons: 1) You eliminate contractor markup (typically 15-30% on fixtures), 2) You control product sourcing and warranty registration, 3) You avoid substitution pressure. The contractor provides installation labor only—they don't get to value-engineer your fixture selections.
Lead time management: CEA fixtures aren't stocked at Ferguson in Topeka. Custom finishes can require 8-12 weeks from order to delivery. Order fixtures during permit review, not after framing inspection. If your plumber is ready to install and fixtures haven't arrived, they'll move to another job and returning them to your project costs schedule and money.
Phased delivery coordination: Rough-in valves ship separately from trim kits. Order rough-ins to arrive for your plumbing rough-in inspection (typically week 8-12 of construction), and trim kits to arrive just before finish installation (week 22-26). Don't deliver $15,000 of chrome faucets to an active construction site where they'll get scratched, stolen, or encrusted with drywall compound.
Installer qualification (why your plumber might not be qualified):
Thermostatic shower systems, wall-mounted installations, and floor-mounted tub fillers require different skillsets than basic faucet replacement. Not all plumbers are equal. Ask potential plumbers: 1) Have you installed CEA (or similar European luxury brand) fixtures previously? 2) Do you have experience with thermostatic mixing valves and pressure-balancing systems? 3) Are you comfortable with wall-mounted fixture installation, including proper backing and waterproofing integration?
If they answer no to any of these, they're not qualified for luxury fixture installation. The $125/hour plumber who's never installed wall-mounted fixtures will cost you more in callbacks and damage than the $185/hour specialist who does it correctly the first time.
Change order prevention strategies:
Include fixture allowances in initial contracts: If clients haven't finalized selections during bidding, establish allowances based on actual product pricing. A $5,000 "plumbing fixture allowance" for a primary bathroom with luxury fixtures is absurdly low—$12,000-$15,000 is realistic. Under-budgeting creates conflict when real pricing emerges.
Pre-purchase samples: For finishes and configurations, obtain physical samples before finalizing specifications. Clients who've touched the actual product rarely waver later. Clients making decisions from online photos frequently change their minds during construction, triggering change orders.
Integrated approval process: Create a fixture submittal schedule: Week 4: Architect provides cut sheets. Week 6: Client approves selections. Week 8: Contractor orders rough-in valves. Week 24: Contractor orders trim kits. This prevents the "client decided they want different fixtures" conversation happening when rough-ins are already installed.
This level of specification rigor isn't excessive—it's appropriate for products representing 3-5% of total project cost but 100% of daily tactile experience. Treat CEA fixtures like you'd treat custom millwork: specific, documented, non-negotiable.
What makes CEA Design's sustainability claims different from the "eco-friendly" marketing every other manufacturer uses?
Every faucet brand now has a sustainability page on their website featuring images of forests and claims about "water efficiency" and "responsible manufacturing." Most of it is performative nonsense. CEA Design's environmental position is structurally different—and this matters if you're an architect documenting sustainability for LEED, WELL Building Standard, or client ESG reporting.
Material selection as environmental strategy (not afterthought):
AISI 316L stainless steel lifecycle: This steel grade contains approximately 17% chromium, 12% nickel, 2-3% molybdenum, and the balance iron—all elements that retain value through infinite recycling. The energy required to produce virgin stainless steel is substantial, but the recycled content in AISI 316L products averages 60-85%. When your CEA faucet eventually reaches end-of-life (in 2055), it becomes feedstock for new stainless products with zero material degradation. Contrast this with chrome-plated brass fixtures, where the dissimilar metals make recycling economically unfeasible—most end up in landfills.
Zero lead content: Federal lead limits (≤0.25% weighted average) allow trace lead in brass fixtures through careful alloy balancing. AISI 316L contains zero lead by composition. This isn't compliance through clever engineering—it's compliance through material purity. For LEED v4.1 documentation or California's stricter standards, this distinction matters.
Manufacturing process documentation (the stuff most brands won't publish):
Facility energy transition: CEA's Bassano del Grappa manufacturing facility transitions to 100% renewable energy in 2025, with public carbon reduction targets. This isn't purchased carbon offsets—this is direct facility conversion to solar and hydroelectric sources. The facility's vertical design minimizes building footprint (more production capacity per acre of land occupied), and underground production areas use geothermal stability for heating/cooling, reducing HVAC energy consumption by approximately 35% versus conventional industrial facilities.
Closed-loop water testing: CEA tests every faucet before shipping, but uses closed-circuit water systems rather than single-pass municipal water. Testing 100,000 faucets annually using single-pass would consume millions of gallons—CEA's system recirculates and filters testing water, reducing consumption by >95%. This is operational sustainability, not marketing sustainability.
Packaging reduction: Luxury fixtures traditionally ship in elaborate packaging (wood crates, foam inserts, excessive protective materials). CEA transitioned to recycled cardboard with minimal plastics, accepting slightly higher damage risk in exchange for eliminating thousands of pounds of packaging waste annually. For specification projects ordering 50+ fixtures, they'll coordinate reduced packaging shipments with contractors.
Product longevity as waste prevention:
The most sustainable product is the one you don't have to replace. AISI 316L fixtures have documented service lives exceeding 30 years in residential applications and 20+ years in commercial environments. Mainstream brass fixtures typically require replacement every 10-15 years due to corrosion, finish degradation, or cartridge availability issues. Over a 30-year building lifecycle, one CEA installation versus three brass fixture replacements represents massive waste prevention—not just the fixtures themselves, but the packaging, transportation, installation labor, and disposal associated with replacement cycles.
Parts availability commitment: CEA maintains parts inventory and manufacturing tooling for discontinued collections. This anti-obsolescence strategy means a 15-year-old faucet with a failed cartridge gets repaired rather than landfilled. Try getting replacement parts for a 15-year-old Home Depot faucet—it's literally impossible because manufacturers deliberately discontinue parts to force replacement purchases.
Documented compliance for green building certification:
LEED v4.1 Material Ingredients (MR Credit): CEA provides Health Product Declarations (HPD) and material composition documentation for fixtures. AISI 316L's simple, known composition makes this straightforward—no proprietary chemical coatings to navigate.
WELL Building Standard (Water Quality): Stainless steel's non-leaching properties support WELL Water Feature W01 requirements. Some brass fixtures can leach trace metals into stagnant water—AISI 316L doesn't.
Living Building Challenge Red List: AISI 316L contains no Red List chemicals. Chrome plating processes historically used hexavalent chromium (Erin Brockovich, anyone?)—while modern processes are cleaner, solid stainless steel eliminates this concern entirely.
California Title 24 and CEC compliance: All U.S.-bound CEA fixtures meet California's stringent efficiency and materials standards, often the most demanding in North America.
Why this matters for your project: If you're designing for institutional clients (universities, healthcare, government), they increasingly require sustainability documentation. CEA provides: Environmental Product Declarations (EPDs), third-party lifecycle assessments, material safety data sheets, and chain-of-custody documentation for all material inputs. This isn't marketing content—these are legally binding documents you can attach to project submittals.
The sustainability difference isn't that CEA is perfect—no manufacturing is truly zero-impact. The difference is transparency, structural commitment, and products engineered for maximum service life rather than rapid replacement cycles.
How-To Guides
How to design a luxury primary bathroom with CEA Design fixtures (step-by-step specification guide for architects and designers)
A primary bathroom with CEA fixtures represents a $12,000-$18,000 investment in plumbing hardware alone. Getting specification right the first time prevents expensive change orders and client disappointment. Here's the professional process:
Phase 1—Program definition (before you touch CAD):
User requirements interview: Who uses this bathroom? How? Couples need dual vanities with adequate separation (48" minimum between centerlines—60" is better). Do they want a soaking tub, freestanding tub, or no tub at all? Shower must accommodate two people simultaneously? These aren't aesthetic questions—they're engineering constraints.
Site conditions assessment: Existing plumbing locations (moving drainage is expensive). Water pressure (affects shower system specification). Available wall thickness for concealed mixers (wall-mounted fixtures require 6-8" of depth—you can't put them on a standard 2x4 stud wall without furring out). Ceiling height and joist direction for overhead shower configurations.
Fixture inventory: Typical primary bath requires: 2 vanity faucets, 1 tub filler, 1-2 shower mixers (possibly thermostatic system with multiple outlets), 1 toilet (if wall-hung, includes flush plate), towel warmers, accessories (toilet paper holder, towel bars, robe hooks). List everything before starting design—discovering you forgot the tub filler after finalizing plumbing rough-ins creates problems.
Phase 2—Collection and finish selection (aesthetic meets functional):
Choose your primary collection: For visual consistency, specify most fixtures from one collection. Common strategies: Ziqq for modern elegance, Opus for transitional sophistication, Cross for geometric minimalism. Each collection offers faucets, shower components, and accessories in coordinated design language.
Finish strategy: Select one primary finish for the entire bathroom. Mixing finishes (chrome on vanity, bronze in shower) rarely works—it looks indecisive rather than intentional. CEA's satin stainless steel is the universally safe choice: sophisticated, hides water spots, matches appliances if this is a bathroom/dressing room combo. Polished chrome for traditional elegance. Black steel or brushed bronze for drama, but understand these show water spots and require maintenance.
Special finish considerations: Premium finishes (PVD-coated bronze, rose gold, black) add 30-50% to fixture cost and often require 10-12 week lead times. If timeline is tight or budget firm, stick with standard stainless steel finishes available from stock.
Phase 3—Vanity faucet specification:
Deck-mounted vs. wall-mounted: Deck-mounted (faucet sits on countertop behind sink) is standard American configuration—easier installation, fewer variables. Wall-mounted (faucet extends from wall above counter) creates cleaner countertop appearance but requires precise rough-in coordination and proper backing. If you choose wall-mounted, verify sink position and faucet reach during schematic design—discovering spout doesn't reach center of sink during installation is catastrophic.
Single-hole vs. widespread: Single-hole (everything in one body) is contemporary and minimalist. Widespread (separate spout and handles) is traditional but requires three holes in countertop. For stone counters (marble, quartzite, granite), every additional penetration is another potential crack point and additional fabrication cost. Single-hole is structurally simpler.
Height and reach: For vessel sinks (sitting atop counter), you need a taller faucet or wall-mounted installation—standard 5" faucets look ridiculous with vessel sinks. For undermount sinks, standard faucet heights work fine. Verify spout reach clears sink front edge and directs water flow to drain location, not front rim where it splashes users.
Phase 4—Tub filler specification (the sculptural focal point):
Floor-mounted vs. deck-mounted vs. wall-mounted: For freestanding tubs (the aspirational choice in luxury primary baths), floor-mounted tub fillers create dramatic visual impact—they're sculpture that happens to fill your tub. This requires routing water supply and drainage through the floor, which is straightforward in new construction but expensive in remodels over occupied space. Deck-mounted (faucet sits on tub rim) works for drop-in tubs but limits tub selections. Wall-mounted is the compromise—works with freestanding tubs, somewhat less dramatic than floor-mounted, requires proper backing in wall.
Thermostatic vs. standard mixing: Thermostatic valves maintain set temperature regardless of pressure fluctuations (someone flushes toilet, shower stays constant temperature). For luxury applications, thermostatic is expected. Flow rate considerations: Most tub fillers deliver 8-12 GPM. A 75-gallon soaking tub at 10 GPM requires 7.5 minutes to fill—that's reality. Clients expecting instant gratification need expectation management.
Handshower integration: Many floor-mounted tub fillers include handheld sprayers for rinsing, cleaning, or hair washing in tub. Verify hose length (72" minimum) and whether clients actually want this—some see it as clutter, others consider it essential.
Phase 5—Shower system specification (where complexity multiplies):
System architecture: Modern luxury showers are multi-outlet systems: rainhead (ceiling-mounted), handshower (wall-mounted on slide bar), possibly body sprays (wall-mounted horizontal jets at torso height). Each outlet requires dedicated water supply and separate control. A four-outlet shower system needs significantly more complex rough-in than a single showerhead.
Thermostatic vs. pressure-balancing valves: Thermostatic systems provide superior temperature control and are required for multi-outlet configurations (you can turn on rainhead only, handshower only, or both simultaneously). Pressure-balancing valves are adequate for single-outlet showers but limit upgrade options.
Rainhead sizing and placement: Bigger isn't always better. A 16" rainhead requires serious flow rate (15+ GPM) to feel substantial—at 1.8 GPM per U.S. efficiency standards, large rainheads can feel anemic. CEA's rainheads optimize coverage with available flow. Placement: Ceiling-mounted creates spa experience but requires ceiling access for plumbing (complicated in remodels, straightforward in new construction). Wall-mounted on articulating arm is compromise solution.
Body spray considerations: Horizontal wall jets sound luxurious but many users find them annoying or turn them off permanently. If specifying body sprays, place them at 42-48" height (torso level, not head level) and on non-showerhead wall (opposite wall or side walls). Four-six sprays typically sufficient—more is excessive.
Controls ergonomics: Thermostatic controls should be positioned 42-48" above floor, offset from direct water spray path, and easily reachable without entering water stream (so you can turn on shower without getting soaked before water warms up). This is basic usability that's frequently overlooked.
Phase 6—Documentation and coordination:
Fixture schedule: Create detailed schedule listing every fixture with manufacturer, collection, model number, finish, and quantity. Include links to CEA specification sheets. This becomes part of construction documents and prevents substitutions.
Rough-in coordination drawings: Work with plumber to create rough-in drawings showing: Supply line locations (hot/cold for each fixture), shut-off valve locations (code requires accessible shut-offs), drain line locations and venting, backing locations for wall-mounted fixtures, and ceiling access panels for ceiling-mounted rainheads.
Electrical coordination: Towel warmers require 120V electrical (coordinate with electrician for outlet location—hardwired is cleaner than plug-in). Sensor-activated faucets require 120V or low-voltage wiring. Heated floors (common in luxury baths) affect plumbing routing through floor.
Waterproofing integration: Wall-mounted and ceiling-mounted fixtures penetrate waterproof membranes. Coordinate with tile installer for proper flashing and membrane detailing at all penetrations. Failed waterproofing is the most expensive fixture-related failure mode—spending $300 on proper waterproofing details prevents $25,000 in water damage repairs.
Phase 7—Procurement and installation sequencing:
Order rough-in valves first: These install during plumbing rough-in, typically week 8-12 of construction. Order 12-16 weeks before this milestone to account for lead times and shipping.
Order trim kits later: These install during finish plumbing, typically week 24-28. Order 8-10 weeks before this milestone. Don't deliver $15,000 of chrome fixtures to an active construction site where they'll get damaged.
Final reality check: A thoughtfully specified primary bathroom with CEA fixtures, executed by qualified trades, creates a daily-use space that functions flawlessly for 20-30 years. A poorly specified bathroom with luxury fixtures installed by unqualified plumbers creates an expensive disaster. The difference isn't the products—it's the process.
How to specify and install wall-mounted faucets without disasters (the details everyone forgets until it's too late)
Wall-mounted faucets create cleaner countertops, easier cleaning, and sophisticated visual appeal. They also create absolute nightmares when improperly specified or installed. Here's everything architects and contractors need to know:
Why wall-mounted installations fail (learn from others' mistakes):
Insufficient wall depth: Standard 2x4 stud walls (3.5" actual depth) plus drywall provide 4-5" total depth. CEA rough-in valves for wall-mounted faucets require 4-6" depth behind finished wall surface. This means standard stud walls are marginally adequate—and that's before accounting for supply lines, shut-off valves, and backing. Most successful wall-mounted installations require furring out the wall to 6-8" total depth, which must be planned during framing.
Incorrect rough-in height: There's no "standard" height for wall-mounted faucets because it depends on counter height, sink depth, and specific faucet model. CEA specification sheets provide rough-in heights from finished floor—use actual dimensions, not assumptions. Installing rough-in valves 2" too low means spout doesn't clear counter edge. Installing 2" too high looks awkward. Verify sink model, counter thickness, and faucet specs before rough-in inspection.
Inadequate backing: Wall-mounted faucets must support their own weight plus user force (people lean on faucets, whether intentionally or not). Attaching directly to drywall is instant failure. Proper backing requires: Horizontal 2x blocking between studs at exact mounting height, or plywood panel spanning multiple studs, or Schluter Systems or similar tile-specific blocking. Install backing during framing—retrofitting requires wall demolition.
Waterproofing conflicts: Wall-mounted faucets penetrate tile and waterproofing membranes. The penetration must be properly detailed to prevent water intrusion into wall cavity. This requires: Waterproof membrane installed before tile, proper flashing collar at faucet penetration, and silicone seal between faucet escutcheon and tile after installation. Missed waterproofing details create slow leaks that cause hidden mold and rot—discovered years later during unrelated remodels.
The correct installation sequence (non-negotiable order of operations):
Step 1—Framing modification (if required): If installing wall-mounted faucet on existing 2x4 wall, fur out wall to create 6-8" total depth. Build frame offset from existing wall using 2x6 or 2x8 lumber, creating recessed niche for plumbing. This happens during framing, before any other trades.
Step 2—Backing installation: Install horizontal blocking at precise faucet mounting height (per manufacturer specs). Use actual CEA rough-in dimensions—don't estimate. Blocking should span minimum two stud bays and be 2x10 or 2x12 lumber for substantial support. Mark blocking location on floor so tile installer knows where solid backing exists.
Step 3—Plumbing rough-in: Install CEA rough-in valve at manufacturer-specified height and depth. Install supply lines to rough-in valve with shut-off valves (code required) in accessible location. Test rough-in for leaks before closing wall—fixing leaks after tile is installed requires demolition. Install temporary plastic caps on rough-in valves to prevent debris contamination during construction.
Step 4—Wall closure and waterproofing: Install cement board or suitable tile backer. Install waterproof membrane (Schluter Kerdi, RedGard, Hydroban, or similar) per manufacturer instructions. At rough-in valve location, cut membrane precisely around valve body and install proper flashing collar to seal membrane to valve. This prevents water from entering wall cavity. Let waterproofing cure fully before proceeding.
Step 5—Tile installation: Install tile per normal procedures. At faucet location, cut tile to accommodate escutcheon plate (CEA provides escutcheon dimensions in product specs). Verify rough-in valve is at correct depth—escutcheon should sit flush with tile surface. If rough-in is too deep, install escutcheon extension (CEA provides these for up to 1" of additional depth). If rough-in is too shallow... you have a problem requiring demolition and reinstallation.
Step 6—Trim installation (after all tile work complete and grouted): Clean any grout or construction debris from rough-in valve threads. Apply plumber's silicone around escutcheon perimeter where it meets tile (waterproofing seal, not just aesthetic). Install CEA trim kit per manufacturer instructions, verifying all gaskets and o-rings are properly seated. Turn on water supply slowly and check for leaks. Adjust escutcheon position if needed to ensure spout angle is correct and handles operate smoothly.
Step 7—Calibration and testing: Test hot/cold operation. Verify spout reach—water should flow to drain, not front rim of sink. Check for leaks at wall penetration and at supply connections. Run water for 5+ minutes to purge any construction debris from lines. Clean fingerprints and installation marks from fixture.
Critical measurements you must verify before rough-in:
Spout reach: Distance from wall to tip of spout must exceed distance from wall to center of sink. Typical vanity counters are 22-24" deep. Typical sinks are 18-20" front-to-back, centered on counter, placing drain 9-10" from wall. Your faucet spout must extend 10-12" from wall to clear sink properly. Verify this math with actual sink dimensions before rough-in.
Spout height above counter: Too low and spout doesn't clear vessel sinks or tall faucet handles interfere with countertop. Too high creates excessive splash. Ideal is 4-8" above counter surface for standard undermount sinks, 8-12" for vessel sinks. This determines rough-in height.
Handle clearance: Lever handles sweep through arcs when operated. Verify handles don't hit tile, countertop, mirrors, or medicine cabinets at full travel. Test this with cardboard mockup before rough-in if uncertain—discovering handle hits mirror after tile is installed creates expensive problems.
What this costs (budgeting wall-mounted installations):
Wall-mounted installation adds $800-$1,500 per faucet versus deck-mounted, including: Rough-in valve ($180-$280), additional plumber labor for rough-in coordination and trim installation (3-4 hours vs. 1-2 hours for deck-mount), framing modifications if required ($200-$400), and additional tile labor for precise penetration cuts. This is real cost, not markup. Wall-mounted looks spectacular but requires investment—budget accordingly or specify deck-mounted alternatives.
When wall-mounted makes sense: New construction or gut remodels where walls are open anyway. Vessel sinks or statement countertops where minimizing penetrations shows material beauty. Contemporary designs where clean lines justify additional cost. When it doesn't make sense: Tight budgets, remodels where walls must remain intact, situations where contractors lack luxury installation experience.
How to maintain and clean stainless steel faucets to preserve finish quality for decades
AISI 316L stainless steel is exceptionally durable, but improper cleaning accelerates wear, damages finishes, and creates permanent staining. Here's what luxury fixture owners and facility managers need to know:
Daily maintenance (what to do after every use):
Wipe dry after use: Water contains dissolved minerals (calcium, magnesium, silicates) that deposit as water evaporates, leaving white spots and buildup. On polished finishes, these are immediately visible. On satin finishes, they accumulate over time, dulling the surface. Solution: Keep microfiber cloth near every sink and quickly wipe faucets dry after use. This 10-second habit prevents 90% of finish issues.
What happens if you don't: Mineral deposits bond to stainless steel surfaces. Light deposits remove easily with water and vinegar. Heavy deposits require abrasive removal, which dulls satin finishes and scratches polished finishes. Prevention is infinitely easier than correction.
Weekly cleaning (proper technique prevents damage):
Correct cleaning solution: Mild dish soap (Dawn, Meyer's, or similar) diluted in warm water. Apply with soft cloth or microfiber towel, wipe all surfaces, rinse thoroughly with clean water, dry completely with separate clean towel. That's it—this removes soap scum, toothpaste splatter, and typical bathroom grime without damage.
Never use (these permanently damage stainless steel): Bleach-based cleaners (Clorox, Lysol with bleach)—chlorine attacks stainless steel's chromium oxide layer, causing pitting and discoloration. Ammonia-based cleaners (Windex, many glass cleaners)—can degrade surface finish over time. Abrasive powders (Comet, Ajax)—physically scratch surface, especially on polished finishes. Acidic toilet bowl cleaners (contain hydrochloric acid)—if splashed on fixtures, rinse immediately or permanent damage occurs.
Special situation cleaning:
Hard water deposits (white crusty buildup): Mix equal parts white vinegar and water in spray bottle. Spray affected areas, let sit 5-10 minutes, wipe with soft cloth, rinse thoroughly with clean water, dry completely. For stubborn deposits, soak paper towels in vinegar solution and drape over deposits for 30 minutes before wiping. Never use metal scrapers or abrasive pads—they scratch stainless steel permanently.
Soap scum: Standard dish soap and water typically sufficient. For stubborn soap scum, use baking soda paste (baking soda + water to form paste), apply with soft cloth, gentle circular motion, rinse thoroughly, dry. Baking soda is mildly abrasive—use minimal pressure.
Toothpaste splatter: Wipe immediately with damp cloth before it dries. Dried toothpaste contains mild abrasives that can dull finishes if rubbed aggressively during removal. Prevention (close toothpaste cap over sink, not while brushing) is easier than cleanup.
Fingerprints (especially visible on polished finishes): Microfiber cloth dampened with water, wipe in direction of grain (if visible grain pattern exists), dry with clean microfiber. For persistent fingerprints, add tiny amount of dish soap to water. Stainless steel cleaner (specialty product) works but isn't necessary for residential applications.
Finish-specific maintenance considerations:
Polished/chrome finishes: Show water spots and fingerprints most visibly. Require frequent drying to maintain appearance. When cleaning, wipe in consistent direction to minimize visible streaking. Consider furniture wax (Minwax paste wax or similar) applied quarterly—creates temporary barrier that repels water and fingerprints, making daily maintenance easier. Apply thin coat, let haze, buff with clean cloth.
Satin/brushed finishes: More forgiving of water spots and fingerprints. When cleaning, wipe in direction of brushed grain—wiping perpendicular to grain highlights scratches. Never use rotary motion on brushed finishes. These finishes hide minor scratches better than polished surfaces.
Specialty finishes (black steel, bronze PVD, rose gold): Follow manufacturer-specific guidance. Some coatings are softer than base stainless steel and require gentler cleaning. Verify with CEA or La Mercanti before using any cleaning products on specialty finishes—some finishes void warranty if improper cleaners are used.
What not to do (common mistakes causing permanent damage):
Don't leave cleaning products on surfaces: Spray-and-walk-away cleaning creates chemical contact time that etches finishes. Apply cleaner, clean immediately, rinse thoroughly. Don't let cleaners air-dry on fixtures.
Don't use abrasive pads: Scotch-Brite (green or blue pads), steel wool, or scouring pads scratch stainless steel. Even "non-scratch" scrubbers are too abrasive for polished fixtures. Use soft cloths, microfiber towels, or sponges only.
Don't mix cleaning products: Bleach + ammonia creates toxic chloramine gas. Bleach + vinegar creates chlorine gas. Use one cleaning product at a time, rinse completely before applying different product.
Don't ignore immediate spills: Acidic substances (vinegar, lemon juice, wine, coffee) can etch stainless steel if left for extended periods. Alkaline substances (drain cleaners, oven cleaners) are even worse. If aggressive chemicals contact fixtures, rinse immediately with large amounts of water.
Commercial/hospitality applications (higher traffic requires adapted protocols):
In hotels, restaurants, or office buildings, faucets experience 10-50x more daily use than residential. Maintenance protocols must scale: Daily professional cleaning with approved products, weekly inspection for loose handles or developing leaks, quarterly deep cleaning and re-lubrication of moving parts, annual professional service including cartridge inspection and seal replacement if needed.
Facility managers should maintain stock of replacement aerators (these wear fastest in high-use applications) and supply line shut-off keys (for quick repair response). Partner with local plumber familiar with CEA fixtures for rapid service response—in commercial applications, non-functional faucets create liability and operational problems.
Long-term preservation (maintaining value through decades):
AISI 316L fixtures should look nearly new after 10-15 years with proper maintenance. If finishes are dulling, discolored, or showing wear patterns: Review cleaning products being used—likely something abrasive or chemical damaging the surface. Check water quality—extremely hard water may require water softener installation to prevent mineral buildup. Verify cleaning technique—aggressive scrubbing damages finishes even with correct products.
Professional refinishing is possible for damaged fixtures but expensive ($400-$800 per fixture). Prevention through proper maintenance is infinitely preferable.
3415 South Sepulveda Blvd
Suite 1100
Los Angeles, CA 90034 - United States
T +1 855 335 8079
VAT IT01525090443